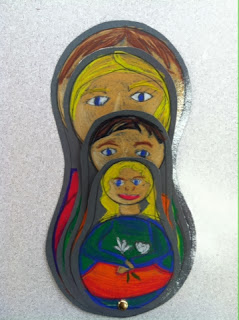
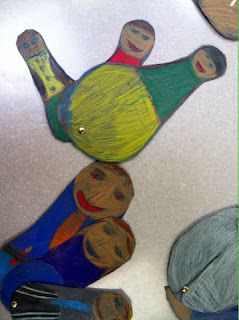
I ran across some cute pictures of nesting doll products on Pinterest, and thought it would be really cute to have the kids make some. I thought about busting out the model magic, but just couldn't find the time left before Christmas to accomplish it. So instead, I made it into a drawing project. Part of third grade curriculum is to make a family portrait of some sort, and I figured this would be a fun way to accomplish that. I found a great website that walked through the history of the nesting doll/objects, so we just scrolled through that for awhile and talked about it.
I wanted to make sure their dolls all had a good base shape to them, so I taught them how to use safety compasses first. I gave them almost 20 minutes with scrap paper to just practice making circles with the compass. You would have thought I gave them new iPads or something... It entertained them forever!

Once they got the circles down, I gave them a large piece of gray construction paper. I showed them how to stack a smaller circle on top of a larger circle to get the basic shape of the nesting doll. These compasses had the rulers on them, so I was able to explain how to make sure the circles would be the right size they needed. Some kids had as many as seven family members, and others had three. The ones with more just did smaller dolls, but I told them they could choose how many.
They understood how to make the faces and hair for the most part, but adding the clothes was definitely challenging. I told them to start with the neckline, shoulders, and waist.
I chose to have them use color sticks to fill the dolls in. These sticks are wonderful! They are sort of combination of a colored pencil and crayon. They are relatively expensive and shatter pretty easily, so I usually just trust the older kids with them. I love how well they blend together. The color choices are limited, but we were able to pretty much make any color we needed. The colors above are skin tones and hair colors I showed them how to make.
I emphasized outlining with darker but similar colors a lot. For example, below I outlined the orange shirt with red so that the sleeves were differentiated from the shirt.
While the kids were still drawing them, I had taken mine to an elementary art meeting in the district. God bless these sweet ladies, they are sooo incredibly helpful to me! One of them suggested fastening them together with a brad so the kids could actually "nest" them.
And it worked wonderfully!!!!!
As you can see, the kids all had their own "unique" shape going on with their dolls, but they all looked cute nonetheless!
A few days too late, I ran across this book on the shelf in our library. It is a Russian folktale centered around Christmas.
I flipped through the pages and ran across the Baboushka polishing these nesting dolls and thought this would be perfect to read to the kids! However, we just ran out of time... Next year!


No comments:
Post a Comment